The Five Seals on a Garage Door (and What Each One Does)
Most homeowners think of "the garage door seal" as a single rubber strip on the bottom. In reality a typical sectional door has up to five distinct sealing systems, and a draft or leak almost always traces back to one specific point. Knowing the parts by name makes diagnosis, shopping, and any conversation with a technician far easier.
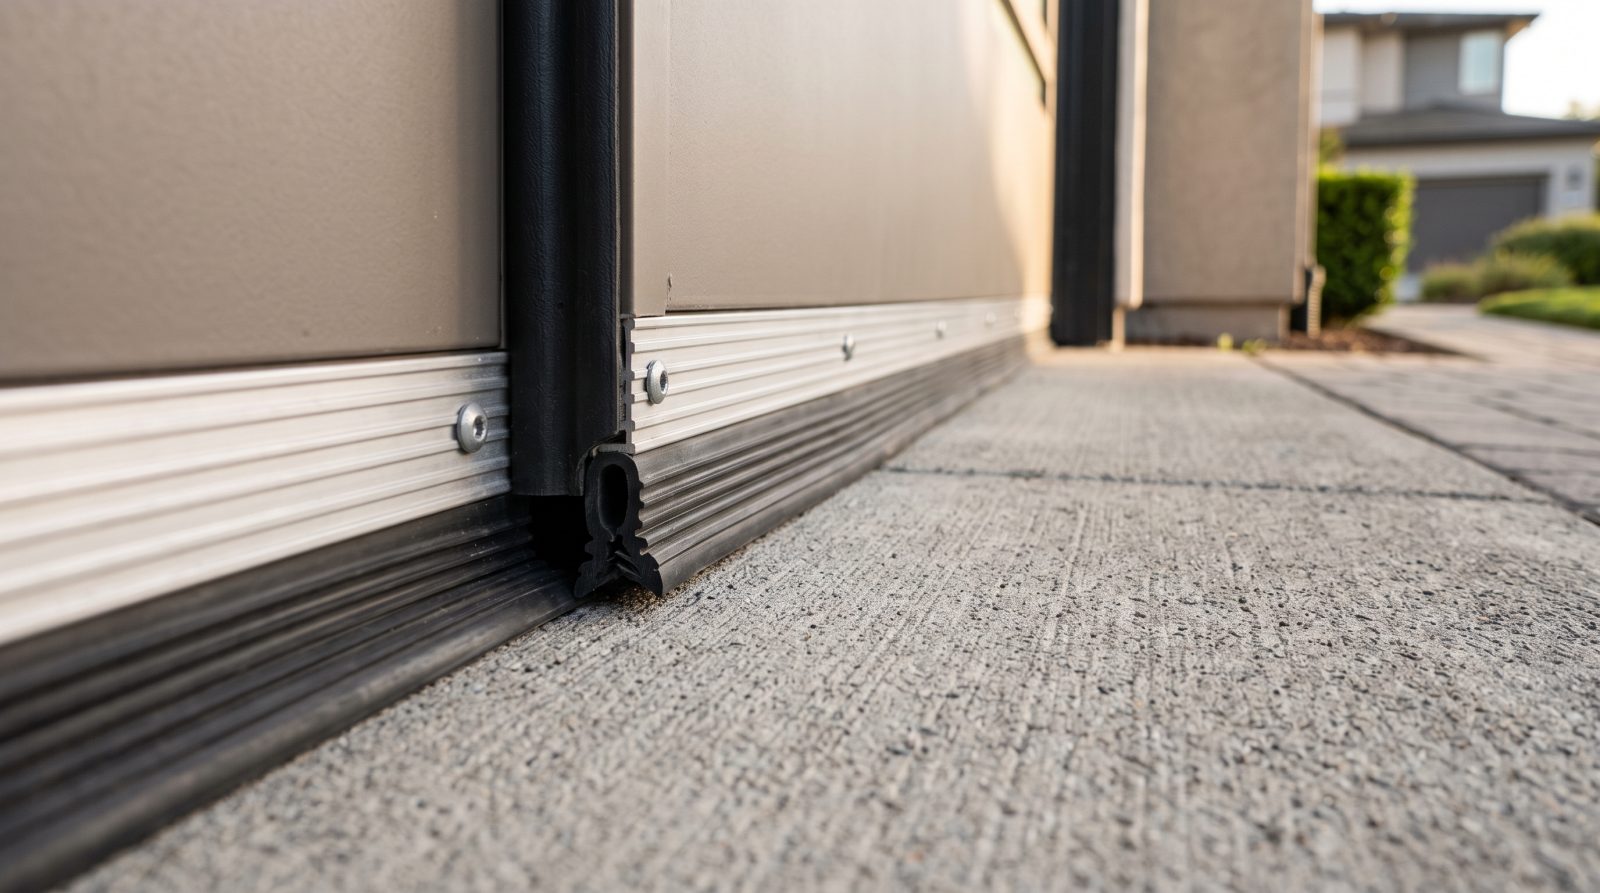
The bottom seal (also called the bottom astragal) is the flexible strip that runs along the very bottom edge of the door and compresses against the floor when the door closes. On most steel doors it is a U-shaped or T-shaped vinyl/rubber profile that slides into an aluminum retainer track on the bottom panel. On older wood doors it is often a flat strip nailed or stapled directly to the wood. This is the seal that does the most work and wears out first, because it is repeatedly crushed against concrete and dragged across grit.
The perimeter weatherstripping (door stop weatherstrip) is the strip attached to the wood door stop molding around the two sides and the top of the opening. It has a flexible flap that presses lightly against the face of the closed door to block wind and rain at the edges. The threshold seal is a separate, optional rubber ramp bonded to the garage floor itself; it works with or instead of the bottom seal and is especially useful on sloped or uneven Bay Area driveways where water tends to run toward the door. Between the horizontal panels you may also have inter-panel or hinge-line seals (a small vinyl bead or shaped panel joint) that block air where sections meet, and finally a top seal, which is sometimes just the perimeter strip and sometimes a dedicated flap for doors with extra clearance at the header.
- Bottom seal / astragal: compresses against the floor, fails first, fixes most under-door gaps and drafts
- Perimeter weatherstrip: nailed to the side and top stop molding, blocks edge wind and wind-driven rain
- Threshold seal: rubber ramp glued to the floor, best for uneven slabs and water that pools at the opening
- Inter-panel seals: the shaped joint where sections meet, blocks air between panels
- Top seal: closes the gap at the header on doors with extra top clearance
How to Tell Which Seal Has Failed
Before buying anything, spend ten minutes diagnosing the actual failure point. The most reliable test is the daylight check: with the door fully closed, go inside the garage in the daytime and look around the entire perimeter and along the floor. A continuous or intermittent line of light under the door points to a worn or wrong-length bottom seal, or a floor that has settled unevenly. Light at the sides and top points to flattened or missing perimeter weatherstripping. For drafts you can not see, run your hand slowly along the edges on a windy day, or hold a lit incense stick or thin tissue near the seams and watch for movement.
Water intrusion deserves its own diagnosis because the fix is different. If water sheets in under the door during a Pacific storm, the issue is usually the bottom seal, the floor slope, or both, and a threshold seal is often the real answer rather than just a thicker bottom strip. If water shows up at the corners or runs down the inside of the door, the perimeter strip or the panel joints are letting wind-driven rain past. Coastal and exposed hillside homes from Pacifica to the Berkeley and Oakland hills get far more wind-driven rain than sheltered inland valleys, so a seal that would be fine in San Jose may not be enough closer to the water.
Inspect the seal material itself, too. Healthy vinyl and rubber are soft and springy. Failed seals are hard, cracked, shiny-flat where they have been crushed, torn at the corners, or chewed (rodents love a soft seal as an entry point, and gophers and rats are a real factor in many Bay Area neighborhoods). If the bottom seal has pulled partway out of its retainer or you can see the aluminum track, the seal is done regardless of how it looks.
- Daylight check at midday is the fastest, most accurate first test
- Light under the door = bottom seal or uneven floor; light at sides/top = perimeter strip
- Water under the door often needs a threshold seal, not just a thicker bottom seal
- Cracked, hard, shiny-flattened, torn, or chewed material means replace, not adjust
- Wind-exposed coastal and hillside homes need more sealing than sheltered inland valleys
Choosing the Right Replacement Seal and Sizing It Correctly
The single most common mistake is buying a bottom seal that does not match the retainer on your door. Aluminum bottom retainers come in different profiles, and the seal has to match the channel it slides into. The two most common are a single-channel retainer that takes a U-shaped (P-bulb or J-type) seal, and a double-channel retainer that takes a T-shaped seal with two beads that slide into two parallel grooves. Look at the end of your existing retainer and count the channels, and note whether the seal beads are round (P/J) or arrow-shaped (T). Bringing a short cut piece of the old seal to the store, or photographing the retainer end-on, prevents a wasted trip.
Sizing matters in two dimensions: profile and length. For the profile, match the channel type first, then pick a seal height that closes your actual gap. A standard seal closes a small, even gap; if your slab has settled or your driveway is sloped, a taller bulb or a threshold seal handles the larger or uneven gap better. For length, measure the full width of the door and add a few inches; standard residential doors are commonly around 8, 9, or 16 feet wide, but always measure rather than assume. For perimeter weatherstripping, measure both sides and the top and buy a bit extra for clean corner cuts.
Material choice affects how long the repair lasts in our climate. EPDM rubber stays flexible across a wide temperature range and resists UV and ozone better than cheap PVC, which matters on south- and west-facing doors that bake in the afternoon sun once the marine layer burns off. Vinyl perimeter strips are inexpensive and fine for sheltered openings. For wood doors, nail-on flat or bead-style seals are the correct profile rather than retainer-style strips. If your door is fiberglass or has a non-standard or proprietary retainer, take a sample to confirm the match or have a mobile technician identify it on site.
- Match the retainer first: count the channels and note bead shape (round P/J vs. arrow-shaped T)
- Photograph the retainer end-on or bring a cut piece of old seal when shopping
- Measure door width and add a few inches; never assume a "standard" size
- Pick seal height to your real gap; settled slabs or sloped driveways may need a taller bulb or threshold
- EPDM rubber outlasts cheap PVC on sun-exposed Bay Area doors; wood doors use nail-on profiles
Step-by-Step: Replacing the Bottom Seal and Perimeter Weatherstrip
Replacing a retainer-style bottom seal is straightforward on a sturdy door, and you do not need to disconnect the door or touch the springs for this job. Start with the door closed so the bottom panel is at a comfortable working height, or raise it partway and clamp it. The old seal slides out the end of the aluminum retainer: free one end and pull it through the channel, using soapy water as a lubricant if it fights you. Clean the channel of grit and old debris so the new seal feeds smoothly. Then feed the new seal in from one end, lining the beads up with the grooves, and pull it all the way across; spraying the channel with a little soapy water makes this dramatically easier. Trim the ends flush and seal the corners so wind can not sneak around the edge.
For nail-on seals on a wood door, pry off the old strip, pull any remaining nails or staples, and fasten the new flat or bead seal with galvanized or stainless fasteners so coastal moisture does not rust them out. Position the seal so it just kisses the floor when the door is closed, not so tight that the door strains or the opener reverses.
To replace perimeter weatherstripping, close the door first so you can set the correct contact pressure. Pry off the old strip from the side and top stop molding. Cut the new strip to length, starting with the top piece and then the two sides, mitering or overlapping the corners for a tight seal. Tack each piece so the flexible flap presses gently against the door face: firm enough to block air and light, light enough that the door still seats fully and the opener does not labor. Test by closing the door and rechecking the daylight and your hand-feel for drafts. If you add or replace a threshold seal, dry-fit it on a clean, dry floor, mark the position with the door closed, then bond it with the correct adhesive and let it cure before driving over it.
- You do not touch the springs to replace a bottom or perimeter seal
- Slide the old bottom seal out the end of the retainer; clean the channel before feeding the new one
- Use soapy water as a lubricant so the new seal feeds and seats without tearing
- Set perimeter strips with the door closed so the flap just contacts the door face
- Use galvanized/stainless fasteners on wood doors so coastal moisture does not rust them
Common Mistakes, Bay Area Realities, and When to Call a Pro
A few avoidable errors cause most reseal headaches. Buying the wrong retainer profile is number one. Over-tightening a nail-on seal or choosing one far too tall is number two: a seal that drags hard makes the door heavy, can trip the opener's safety reverse, and wears out fast. Ignoring the floor is number three: if the concrete slab has cracked and heaved (common on older Bay Area lots with expansive clay soils and seismic settling), no bottom seal alone will close an uneven gap, and a threshold seal or floor leveling is the right call. Finally, treating a symptom in the wrong place, like buying a thicker bottom seal when the leak is actually wind-driven rain at the corners, wastes money and leaves the real gap open.
Our local conditions are worth designing around. In coastal and bayfront cities the salt fog corrodes fasteners and retainers and degrades cheap seal material, so favor stainless hardware and UV-stable EPDM. Wind-exposed homes in the hills and along the coast need attention to the perimeter and panel seals, not just the bottom. Inland communities in the South Bay and East Bay valleys see big day-night temperature swings and dustier air, so seals that stay flexible and a well-sealed perimeter keep the garage cleaner and more comfortable. Rodent pressure is real across much of the region, and a soft, intact bottom and threshold seal is one of the cheapest deterrents to mice and rats slipping under the door.
Much of resealing is genuine DIY, but some situations are better handed to a mobile technician. If your door is unusually heavy, if you discover damaged or rusted retainers, if the bottom panel itself is dented or bowed so the seal can not contact evenly, if the floor is badly out of level, or if you simply want it done right in one visit with the correct parts on hand, that is where a pro saves time and frustration. Critically, never attempt seal work that requires loosening, adjusting, or working around the torsion or extension springs and their cables: those are under extreme tension and are a known serious-injury hazard. If a job drifts into spring, cable, drum, or track territory, stop and bring in a professional. As a mobile, we-come-to-you service across the Bay Area, Bay Area Garage Door can identify your exact seal profile, bring the right materials, and reseal the door on site. Call for a free quote.
- Wrong retainer profile and over-tightened seals are the top two DIY mistakes
- An uneven or heaved slab needs a threshold seal or leveling, not just a thicker bottom strip
- Use stainless hardware and UV-stable EPDM in salt-fog coastal and bayfront areas
- Intact bottom and threshold seals are a cheap, effective rodent deterrent
- Never touch the springs or cables; that is a serious-injury hazard best left to a pro